Our NEW isolved release goes live November 12, 2021
Release 7.21 – The updates keep coming! We are working hard to provide the best tools for you and your team.
ACA Report Options UI
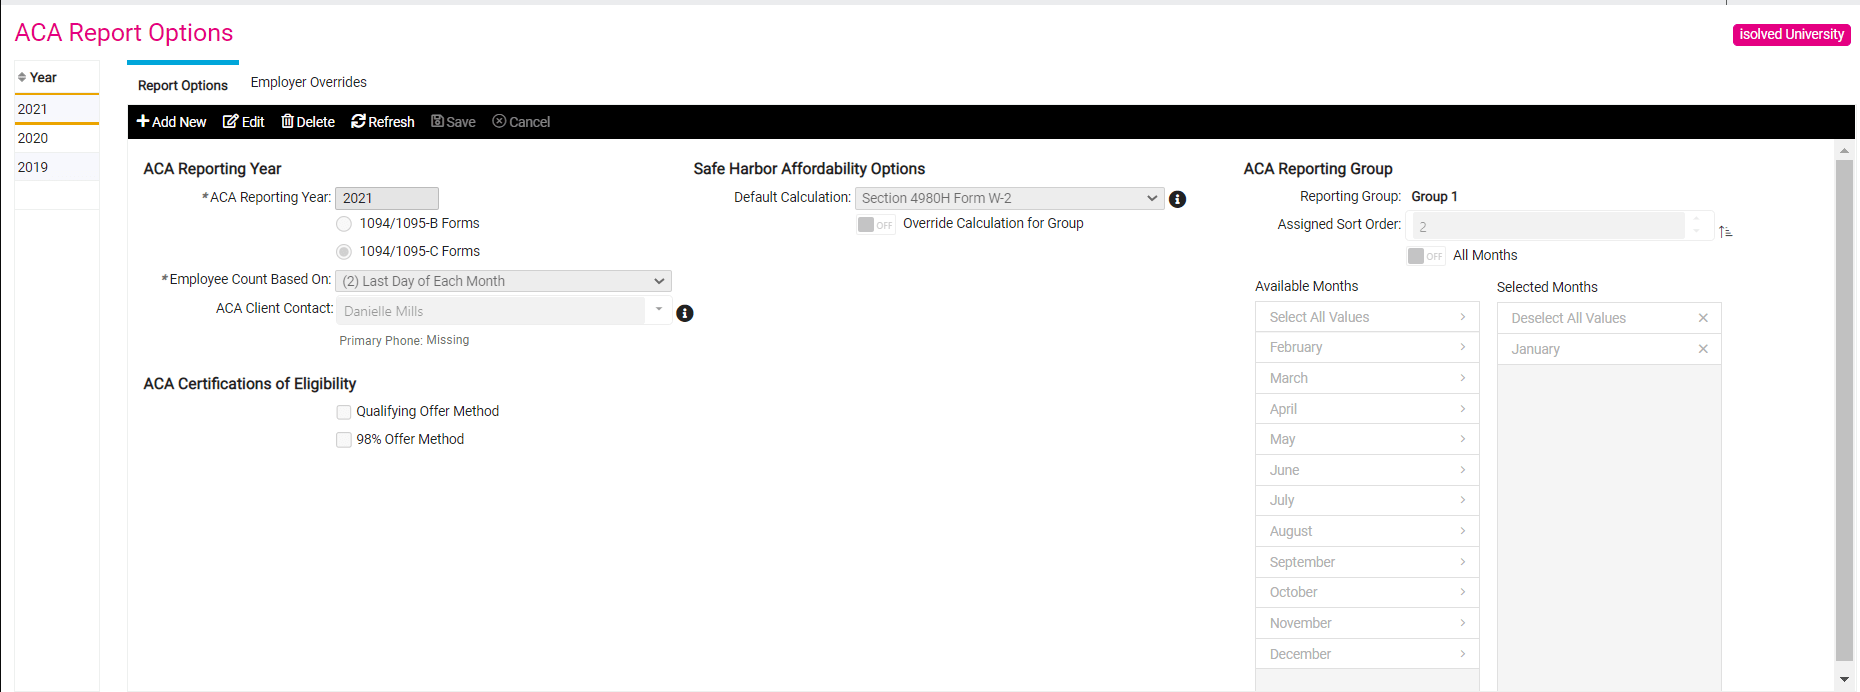
Release 7.21 continues our ongoing UI/UX changes and improvements to our core ACA interface. We made critical design updates to the Client Management >ACA Setup Options > ACA Report Options screen. We made the ACA Client Contact field a searchable, drop-down box where users can type in the name of their preferred contact record. After selecting a user contact, the user interface will now display either the Primary Phone number or communicate that the primary phone number is missing as shown in Screen Shot 1 below.
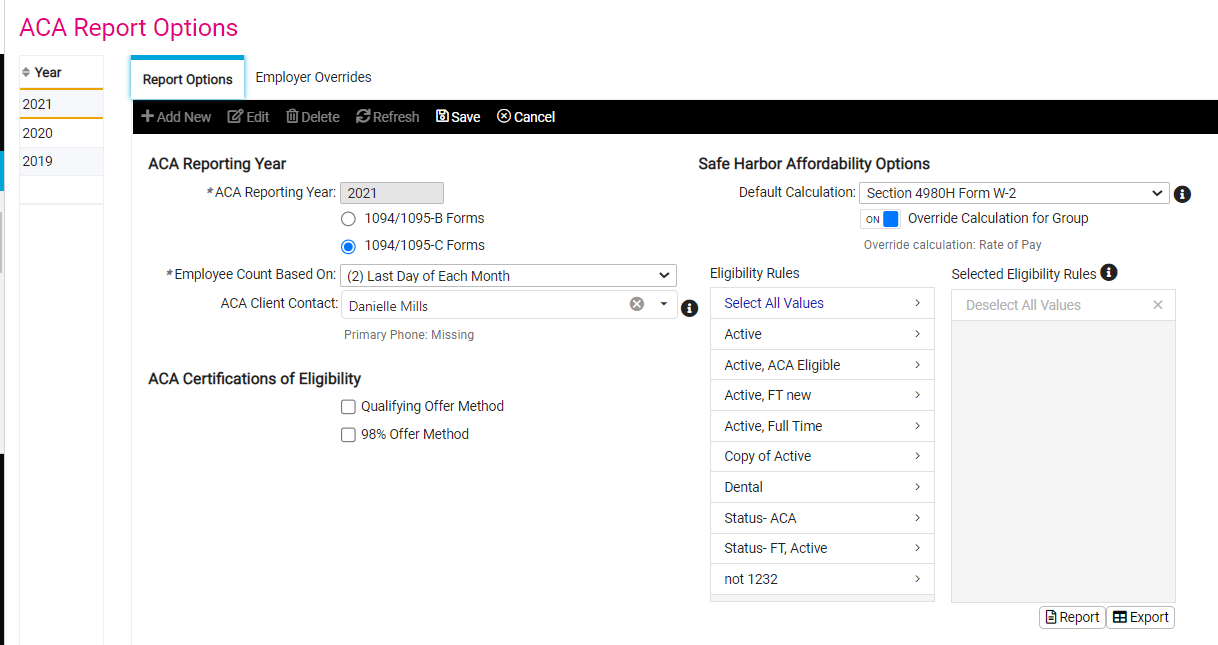
 We understand managing ACA reporting can be an onerous, time-intensive process. A new screen titled “Client We have made changes to the Safe Harbor Affordability Options section on the same ACA Report Options screen. Currently, the logic for determining Safe Harbor defaults to analyzing the W-2 and using Rate of Pay if the plan is determined to be unaffordable. While W-2 will remain the Default Calculation, we will now allow users under Client Management >ACA Setup Options > ACA Report Options to make Rate of Pay their selected Default Calculation as shown below.
You can now exempt a group of employees from the specified Default Calculation. You would select ON for the Override Calculation from Group check box above in the Safe Harbor screenshot. Then create an Eligibility Rule and move it from Eligibility Rules to the Selected Eligibility Rules column as shown for the Commission employees below. That means that commissioned employees would now use W2 as their Override Calculation.
This interface allows you to create multiple Eligibility Rules to address various internal employee groups requiring exemption from the Default Calculation for this specified ACA Reporting Year. Finally, the Report and Export buttons in the image below the Selected Eligibility Rules column allow you to self-audit whether you have included all intended employee groups who are exempt from the Default Calculation selected under Safe Harbor Affordability Options.
Note: the UI/UX changes are going live in the 7.21 release on November 12, 2021, without functional changes to the system. The corresponding logic and functionality supporting the UI/UX field and interface changes on the Client Management >ACA Setup Options > ACA Report Options screen will included in the subsequent 7.22 release on December 3, 2021.
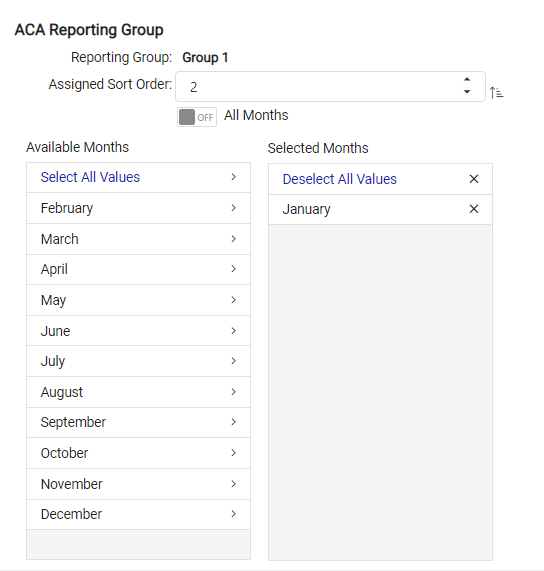
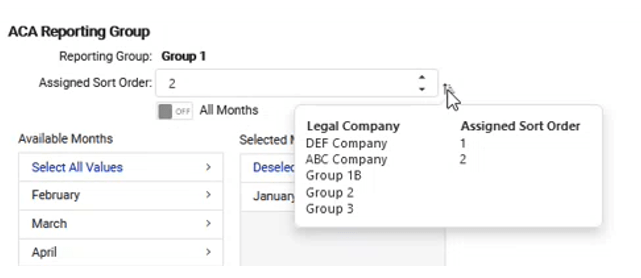
 We made imperative changes to the ACA Reporting Group section on the ACA Report Options screen. We have added the ability to select All Months or Available Months for the specified Reporting Group. One can add months to the selected ACA Reporting Group by moving months from the Available Months to Selected Months column. Users can select All Months by turning on the ON switch. Assigned Sort Order field allows users to stipulate what order the legal companies in the selected Reporting Group appear on the annual 1094 form. Hovering over the icon to the right of the Assigned Sort Order fields brings up a pop-up screen showing the Legal Company list and their respective Assigned Sort Order.
 ACA Approval UI
7.21 makes design changes and enhancements to the ACA Forms Approval screen which can be found via the following path: Client Management > ACA Setup Options > ACA Forms Approval. We have rearranged the user actions and placed them on separate cards with the following five cards with the associated functionality.
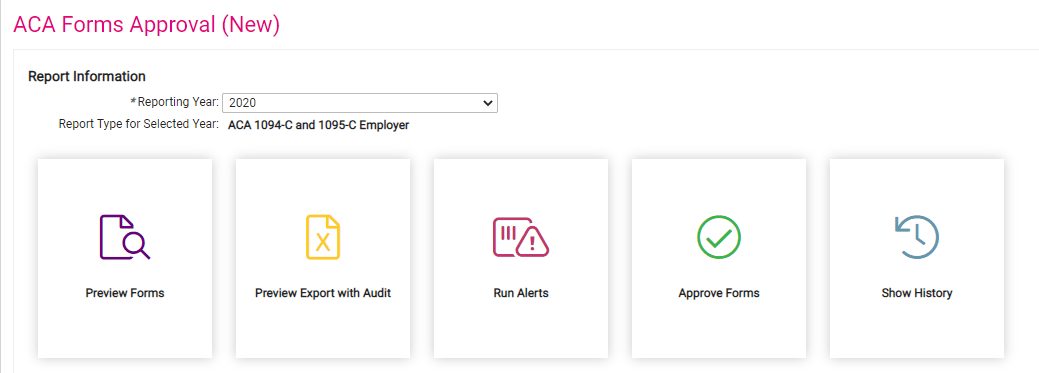 Preview Forms: Selecting the Preview Forms card will catalyze the report generation and will now display a interface link Click here to bring you to My Reports Queue.
- Preview Export with Audit: Preview Export with Audit is the Microsoft Excel version of the Preview Forms report. When selecting this second card, the report request is once again submitted to an individual user’s My Reports Queue.
- Run Alerts: The Run Alerts is the PDF version of the Preview Forms report which will show critical errors or warnings that need to be addressed for successful ACA annual processing. This card will also include a link to the My Reports Queue in the user interface.
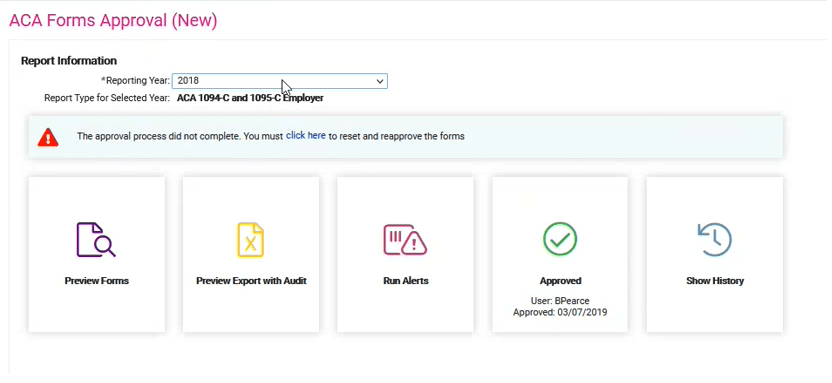
- Approve Forms: The Approve Forms card selection brings up a secondary screen entitled Certification Statement which has a check box with text that states, I hereby certify I have utilized the audit reports and alert tools to identify correct potential or critical errors detected. I also certify that to the best of my knowledge; the forms are true and correct. Clicking the available checkbox enables the Approve Forms button shown in Screen shot 8 below. Screen Shot 9 shows what the card looks like after the approval has been submitted. The text changes from Approve Forms to Approved; the user and approval date are listed on the card in the user interface on the ACA Forms Approval screen.

- Show History: Clicking on the Show History card brings up the secondary screen displaying a table with the following columns: Generate Begin, Generate End, Output Generated, Action, and User. This table cites the relevant history for your associated ACA annual year as specified in the Report year drop down box under Report Information. The Output Generated column in this table specifies whether there is output contained in the year end report archive. A Yes value in this column specifies the most recent output with time and date stamps.
When the approval form process fails in isolved, you can see the UI/UX warning with the text The approval process did not complete. You must click here to reset and approve the forms as shown below. This will then reverse user actions and take them back to the ACA Forms Approval screen where the Approve Forms reverts back to its original state.
Time Card Permission Rules (Require Geo-Location When Punching)
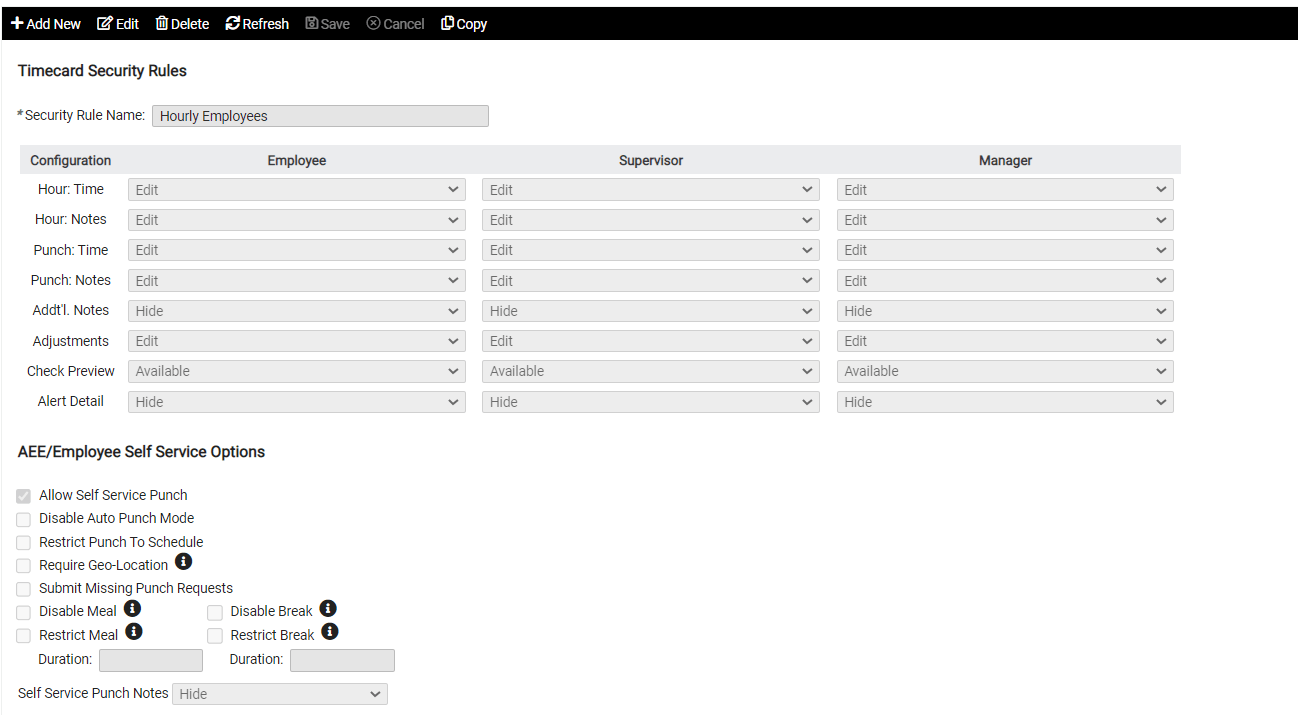
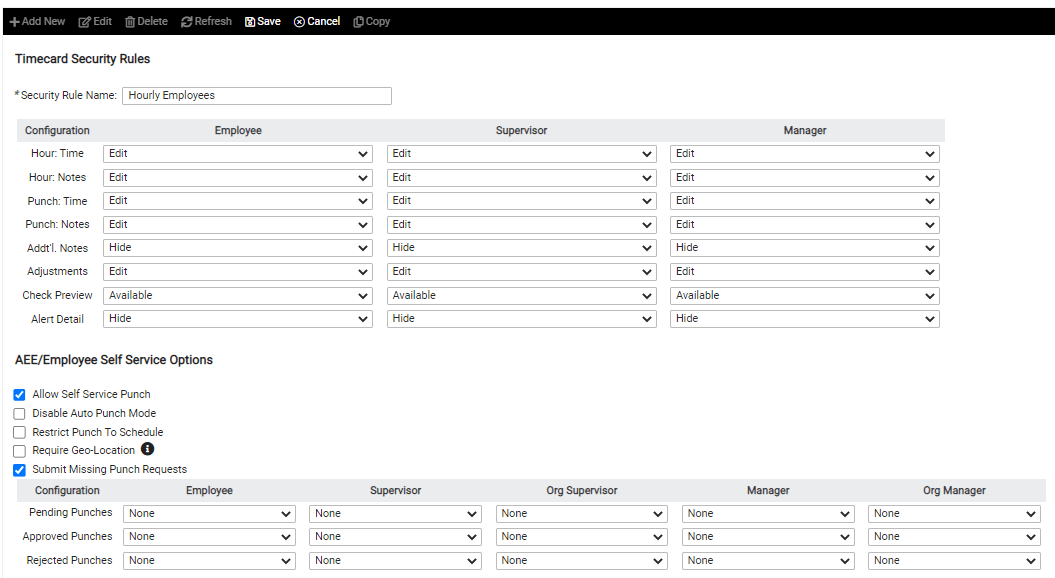
Release 7.21 has added the option to Require Geo-Location as a checkbox under our Time Card Permission Rules. When visiting Client Management > Time Management > Time Card Permission Rules screen, you will see the newly added Require Geo-Location checkbox under the AEE/Employee Self Service Options section. Hovering over the information icon to the left of the Require Geo-Location checkbox shows has pop up text that says, “Geo-Location is only available for AEE/Mobile Punching”. Enabling this feature will turn off punching through the traditional, classic ESS (Employee Self Service) avenues and force employees to use AEE and Mobile punching where their geo-location can be tracked.
Time Off Request
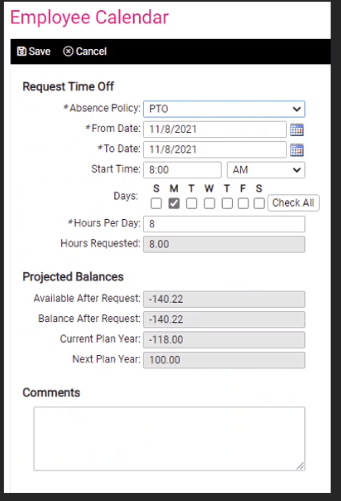
When visiting Employee Self Service > Time > Employee Calendar, you can select the Request Time Off link in the black navigation bar. This brings you to the Request Time Off screen which now has a field entitled Available After Request and Balance After Request under the Projected Balances section on this page. The former option Available After Request is their balance based on Year To Date Taken Limit which is how much PTO they can take before the new year begins. Balance After Request is their actual balance.
 Virtual Clock Registration
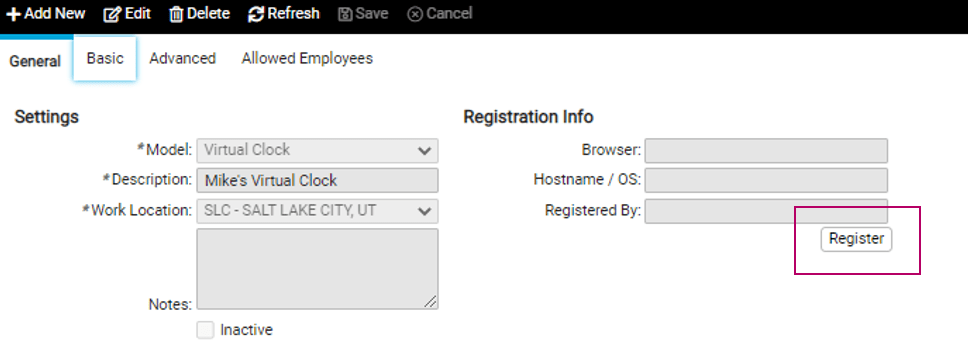
The updates to our virtual clock we geared towards the simplifying the registration process. The old registration process involved users logging in and navigating to the Manage Clocks Screen, selecting their preferred clock from the list, and pressing the “Register” button as shown below. Navigating that UI/UX path could be onerous and cumbersome when users were viewing isolved on six- or seven-inch screen.
 Release 7.21 creates a virtual clock registration page which prevents you from having to go into the full isolved core application. Initially, users must go to the “Manage Clocks” screen to add their clocks originally. You can now leave the “Registration Info” blank and register right from the device.
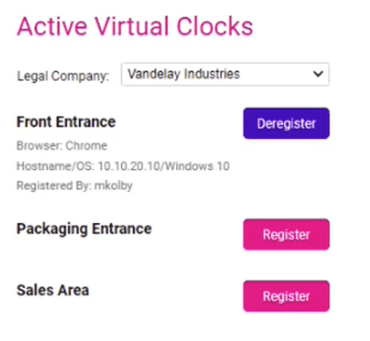
Our exciting, streamlined Virtual Clock Registration screen is reached when clients navigate to their isolved URL and adds “/VirtualClockRegistration” to the end.
(e.g. www.myisolved.com/VirtualClockRegistration) and see the “Active Virtual Clocks” screen shown below. This new functionality prevents users from having to navigate into isolved core. Registration is achieved by clicking the “Register” button.
 Note: The Virtual Clock Registration feature is currently limited to Client users.
Time Card Permission Rules (Missed Punch Notifications)
When first launching isolved’ s submit missed punch feature, we allowed employees at the Employee Self Service (ESS) level specify their miss and create a punch which appeared on a dashboard for managerial and supervisory approval. The Time Card Permission Rules screen now has an area to configure what type of notifications should go out and who they should go to. You can now dictate whether this enabled notification recipient list includes Employee, Supervisor, Org Supervisor, Manager, and Org Manager.
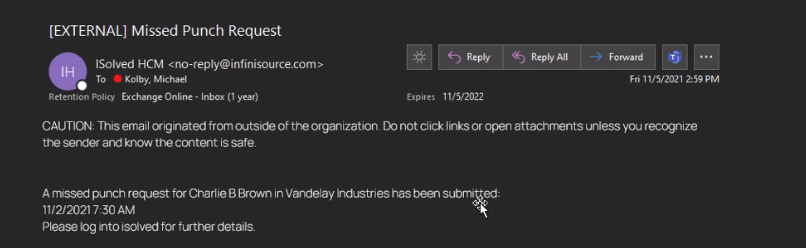
 The options allow you to send the notification via email, adaptive employee experience (AEE), or both for pending, approved and rejected punch requests. Below is an example of the email that will be sent.
Adaptive Employee Experience
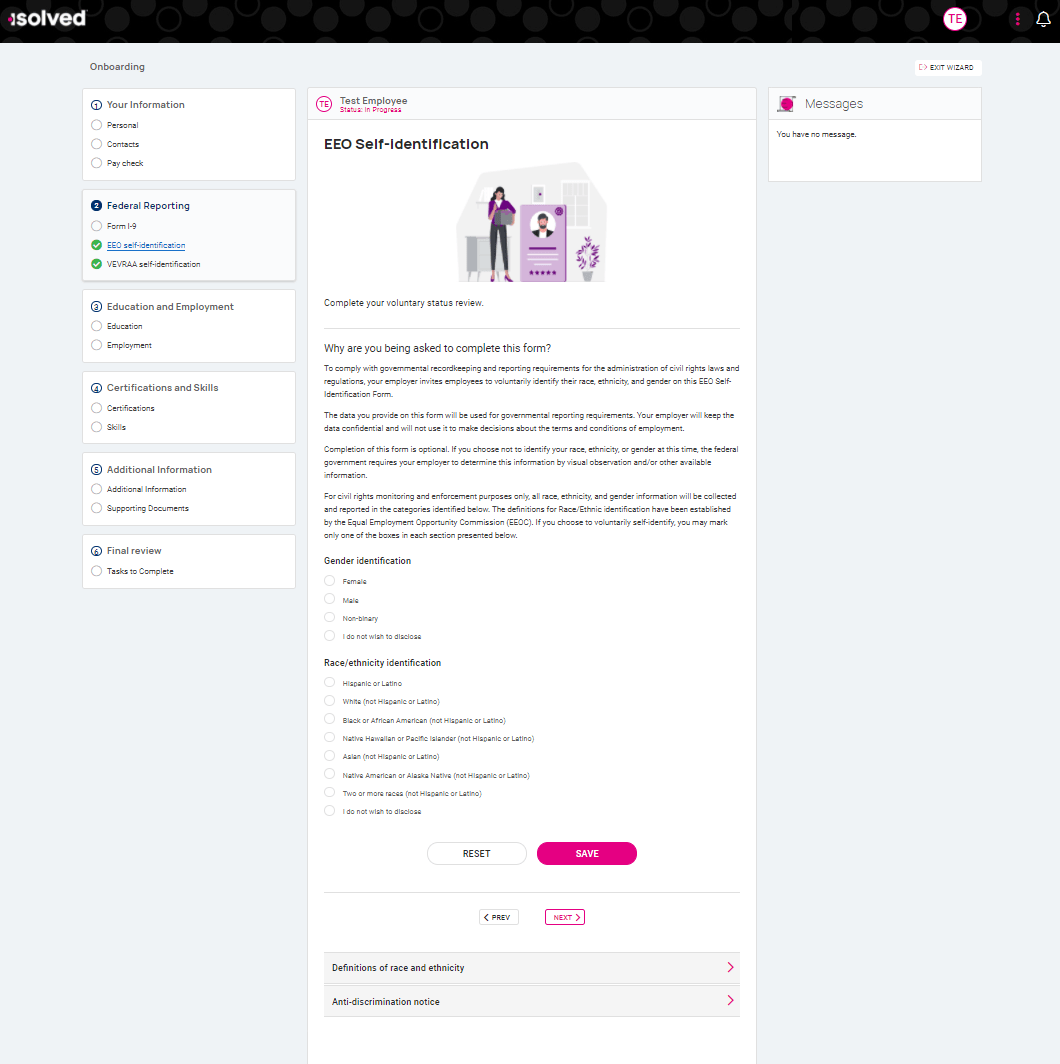
We are thrilled to announce the functionality of mobile Onboarding in the Adaptive Employee Experience. The process of building templates, deciding which sections to include, and attaching required forms remains unchanged and will be setup in the core isolved screens. We have added two key values: Preferred Pronouns and Alternate Address with the following options under the Personal section:
- I have a military address
- User for paychecks
- Use for tax forms W2, 1099, ACA form 1095
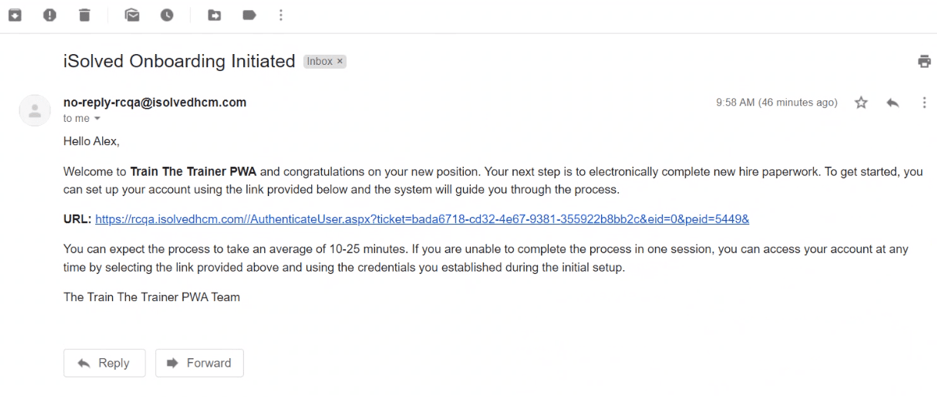
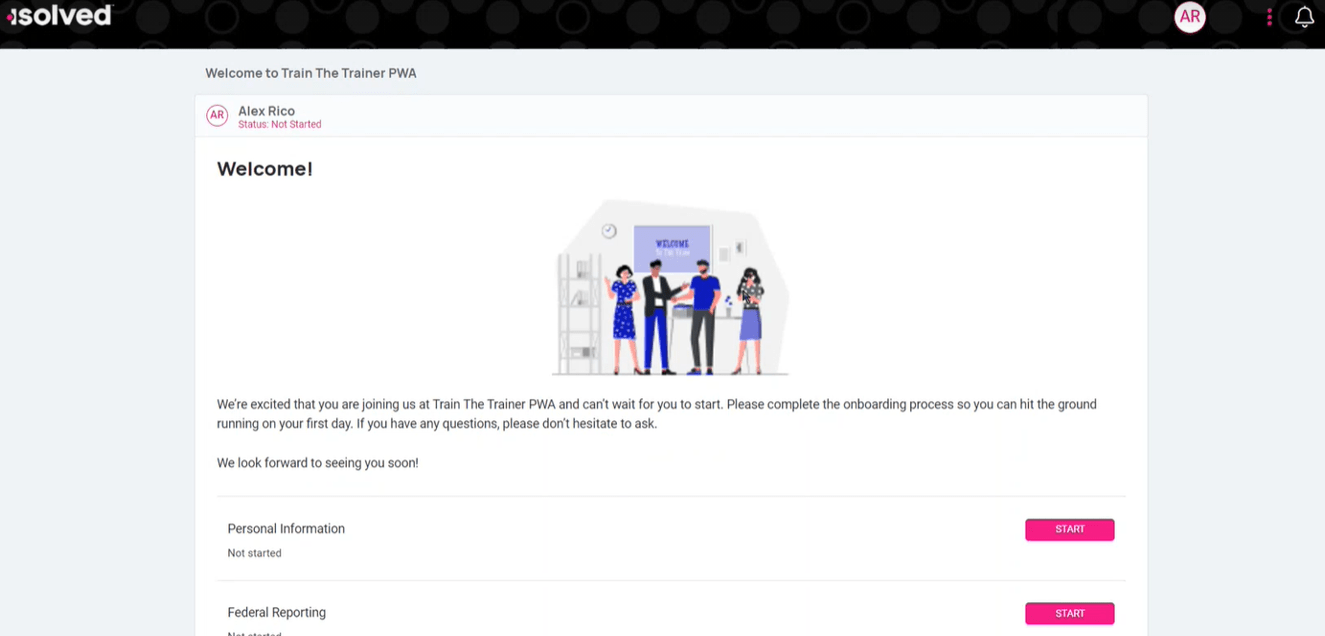
This notable release change is found when your company has transitioned to using the Adaptive Employee Experience. Users are prompted to go through the Adaptive Employee Experience login when you receive a link via an email template as shown below. This simple, in-demand process brings users to a streamlined, dynamic Onboarding workflow within our Adaptive Employee Experience (AEE) which is available on computer, tablet, or phone. The exceptional AEE interface will have pink Start buttons for the sections that your organization has enabled in their previous onboarding set up. After selecting Personal Information, the user in question is taken to a screen an onboarding landing page where there’s an easy, intuitive check box list of options on the far left. Users can start at the top with or fill out the requested information in a haphazard order that reflects their organic ability to collect and provide all required documentation. The final entry in the check box list is entitled Final Review which will highlight the missing documentation under the radio button entitled Tasks to Complete. This ensures that no critical onboarding employment documentation is omitted.
Note: The Adaptive Employee Experience (AEE) Onboarding immediately take affect for your new employees on November 12, 2021 if you are currently using AEE and isolved Onboarding. If these two services are both enabled, the first user who begins onboarding will be routed to the new AEE interface shown in the images above. Employees who were in the middle of their onboarding process will also be redirected to the new AEE interface if they login to complete this after the release goes live in production.